You don’t need a darkroom for processing film but you will need one for making black and white prints. Here are some ideas for setting one up and the equipment that you need.

Blackout
Darkrooms need to be reasonably light-tight. Windows will need to covered with material to block light entering the room. Similarly, light-leaks around doors need to be covered. A curtain hanging over the door frame is often enough to sort this. Window frames can be blocked with light-proof material held up with velcro. Self-adhesive velcro loops is stuck to the inside of the window frame and velcro hooks are stitched to the light-proof material. Pushing the 2 together should block the window for the room while you use it as a darkroom.
Enlarger
You will need an enlarger if you want to make prints larger than the size of your negatives! eBay and Etsy are excellent online sources for used enlargers, as are local car boot sales. Sometimes just asking people you know will turn up an enlarger, many times for free. You can still buy new enlargers too, current manufacturers include Beseler, Kaiser and Paterson, for example.
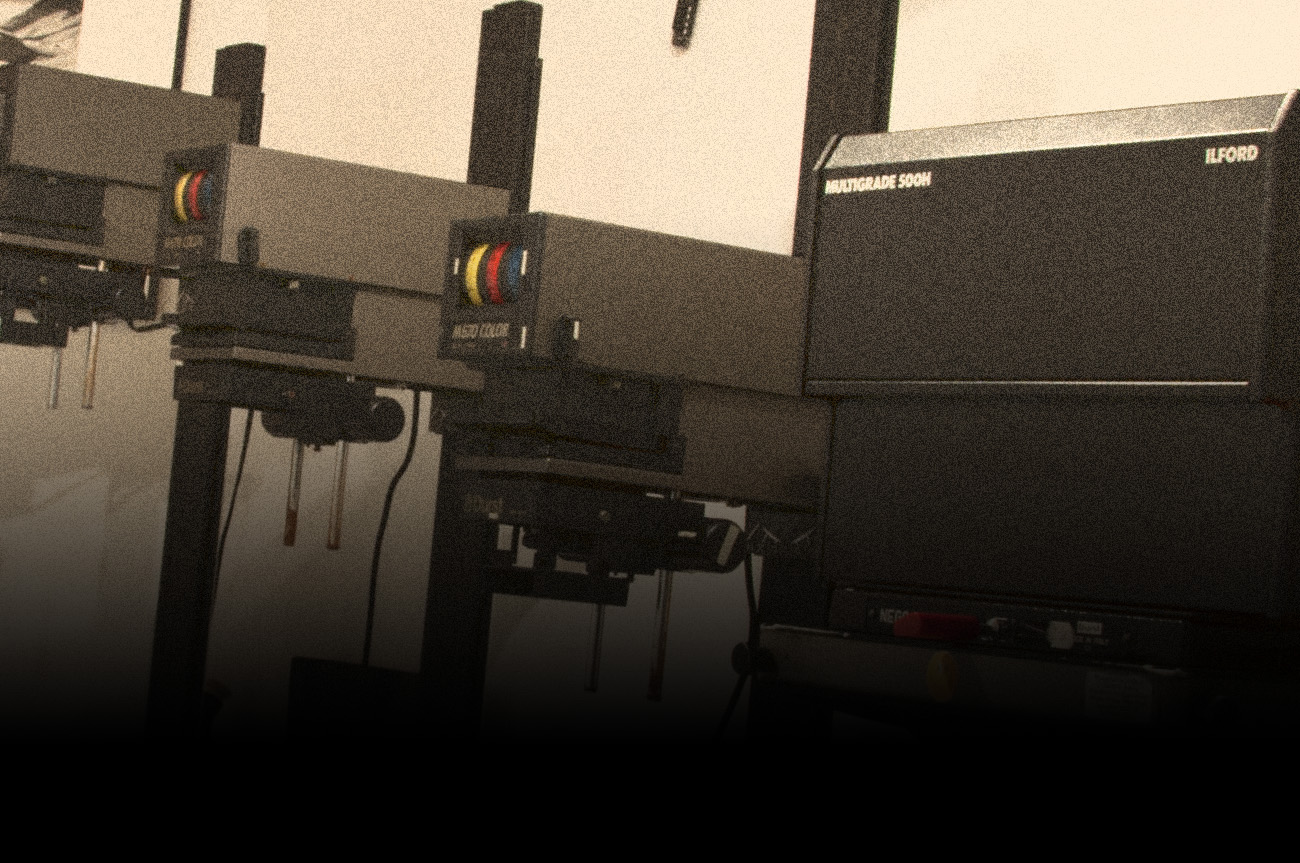
I have six enlargers in my darkroom for the printing courses I teach. Durst M670 Color and Durst M670 BW enlargers were widely sold in the UK so there should be lots of these available secondhand. These are both good reliable enlargers. The colour enlargers are preferable for black and white as the diffuse light source gives less dust and hairs on final prints. Black and white enlargers like the M670 BW usually have condenser lenses that focus every bit of dust on all of the glass and film surfaces in the optical system. If you are new to the darkroom I suggest you try and obtain a colour enlarger. Either of these enlargers can print 35mm and 120 negatives up to 6×7 cm.
Both of my ‘M670’ enlargers are fitted with under the lens Ilford Multigrade filters. This is by far the simplest setup for split grade printing (the main technique for printing with Multigrade papers) in the absence of a dedicated variable contrast head like the Ilford Multigrade MG500. Using a colour head and changing filtration for each exposure is possible but very time consuming and error prone compared to using the Ilford Multigrade filter set.
I also have 2 DeVere 203 enlargers, a Varicontrast one with a built-in Multigrade head and a Varicon black and white one with condenser lenses and a drawer for Multigrade filters. The DeVere with the dedicated head for Multigrade is excellent for black and white printing but it is big and heavy so cannot easily be moved.
In addition, I have a DeVere 504 and Durst 138, both with Ilford Multigrade 500H heads. These are the easiest to use but are by far the biggest and heaviest of the bunch. For example, the Durst 138 is floor standing and could run on rails and project the negative onto the wall for really large prints, if needed. It’s also over 50 years old but still going strong! The 500H heads have two 300 watt lamps, one yellow and one magenta-filtered, to keep exposure times short, typically 3 to 6 seconds at f8 for a 16 x 12 inch image. Both of these can print negatives up to 5 x 4 inches.

Enlarger Lens
New enlargers are usually supplied without a lens. Top enlarger lens manufacturers include Rodenstock and Schneider but Nikon, Durst and several other companies make good lenses too. Enlarging lenses are optimised for darkroom printing onto a flat surface, unlike camera lenses. If you find a used enlarger there is a good chance there will be a lens sold with it.
You will need a lens for each negative size that you will be printing. 35mm needs a 50mm lens, 6×6 and 6x7cm need an 80mm or 90mm lens, 4×5 inch needs a 150mm lens.
Most darkroom lenses work best when stopped down 2 or 3 stops, which is usually around f/8 or f/11, and can give appalling sharpness at either extreme of the f-stop scale. If you have a good lens on your camera and want to make good prints, buy a good quality enlarging lens!
Timer
A timer is useful for turning the enlarger on and off but is not essential, you can just turn the power on and off at the wall. This was how I worked when I first set up a darkroom.
If after experimenting with a simple set-up you decide to get serious about making your own prints, you can expand your darkroom equipment at a later date. For my personal work, my main enlarger is the DeVere 504 with Ilford 500H Multigrade head and Ilford 500CPM timer unit. I control everything using the 500CPM keypad with 9 memories for exposure time and grade combinations. It is an ideal setup for split grade printing since everything can be programmed in rather than remembering to dial in several different filtration settings on a colour head to change the contrast. A foot-switch is used to turn it on (or off) and this leaves my hands free to dodge and burn as soon as the lamps are turned on. Foot-switches are helpful but definitely not essential.
Grain Magnifier
This does exactly what it says on the box, it magnifies the grain of your negative as it is projected on the enlarger easel. It is the best way to make sure that your negative is in sharp focus. You need to adjust the magnifier for your eyesight before you use it for the first time then it takes just a few seconds to focus each negative before you start printing.
Easel
A paper easel is useful for holding paper flat and to stop it moving under the enlarger. They also give an easy way to put white borders around your image to make final prints a bit more presentable. If you use Ilford Resin Coated (RC) paper it will lie flat under your enlarger so you can manage without an easel if funds are tight. You will need an easel if you want to use Ilford Fibre Based (FB) papers.
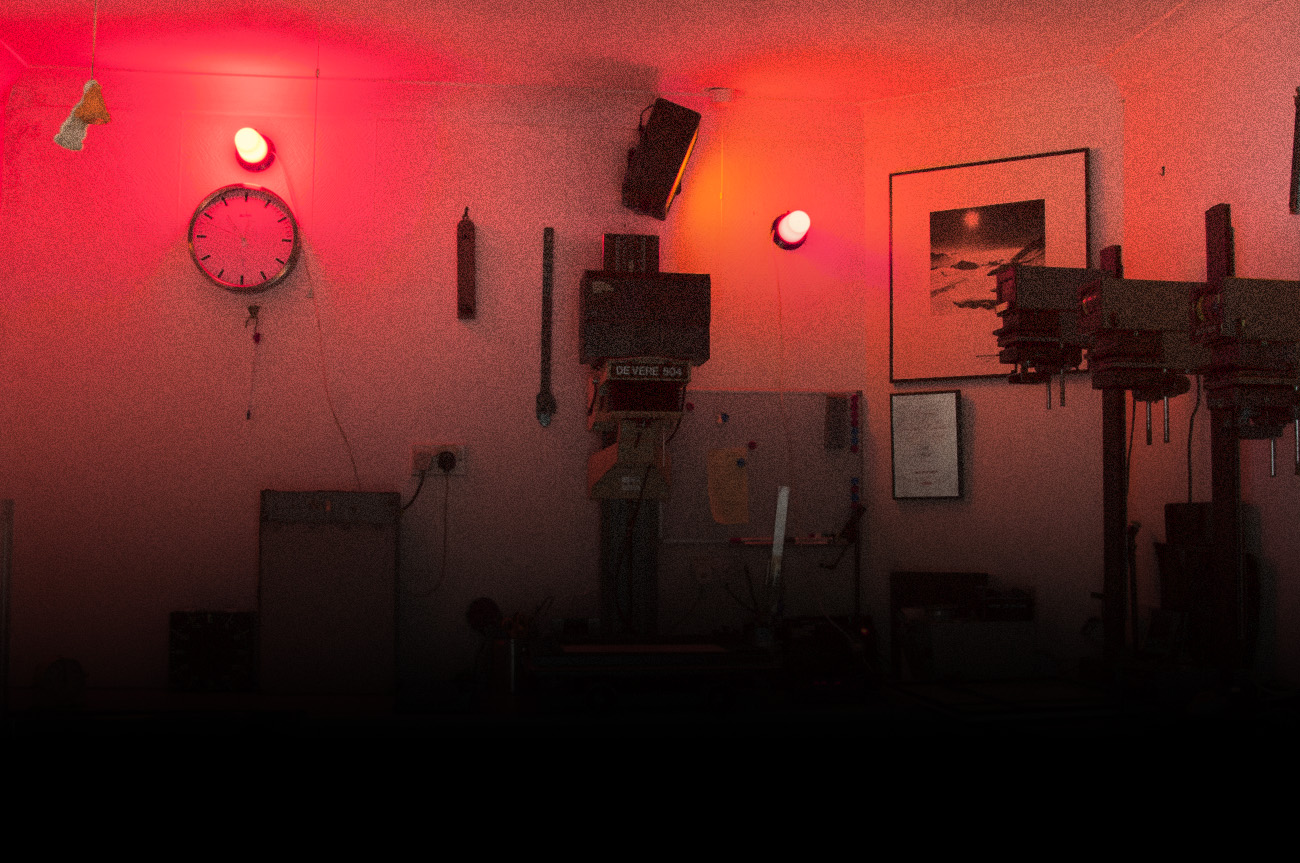
Safelights
Darkrooms don’t have to be dark! Well, not totally. Ilford photographic papers can be exposed to quite high levels of safelight without fogging them. Just follow the manufacturer’s instructions as far as distance between paper and safelights are concerned and all should be well.
Ilford Multigrade paper is not very sensitive to red or orange light and dark yellow is often fine too. If in doubt, do a simple test, such as the ‘Penny Test’ to confirm the maximum time that is safe in your darkroom for each paper that you use. Put a piece of Multigrade, or whatever other paper you use, on the table in a bright part of the darkroom with safelights on and place several coins across the paper. Write next to each coin the time that it will be on the paper. Lift off each coin as the time comes around. Process the paper once all the coins have been removed. I suggest you use 2, 5, 10 and 20 minutes. Repeat the test in different parts of the darkroom if you feel it necessary.
There are many types of safelights commercially available, both secondhand and new. Buy one or two so that you have enough light to work by. I use four Ilford DL20 safelights with 15 watt bulbs. These are 10 x 8 inch wall-light safelights with Ilford 902 filters (orange in colour) in my 12 x 9 foot darkroom, one on each wall and mounted just below the ceiling. The one nearest the enlarger is wired to the enlarger timer so that when the enlarger is exposing paper the safelight is automatically turned off. The image on the easel is then as bright as possible during dodging and burning. There are another 4 small red safelights to give low illumination to otherwise dark areas in the darkroom.
Filters
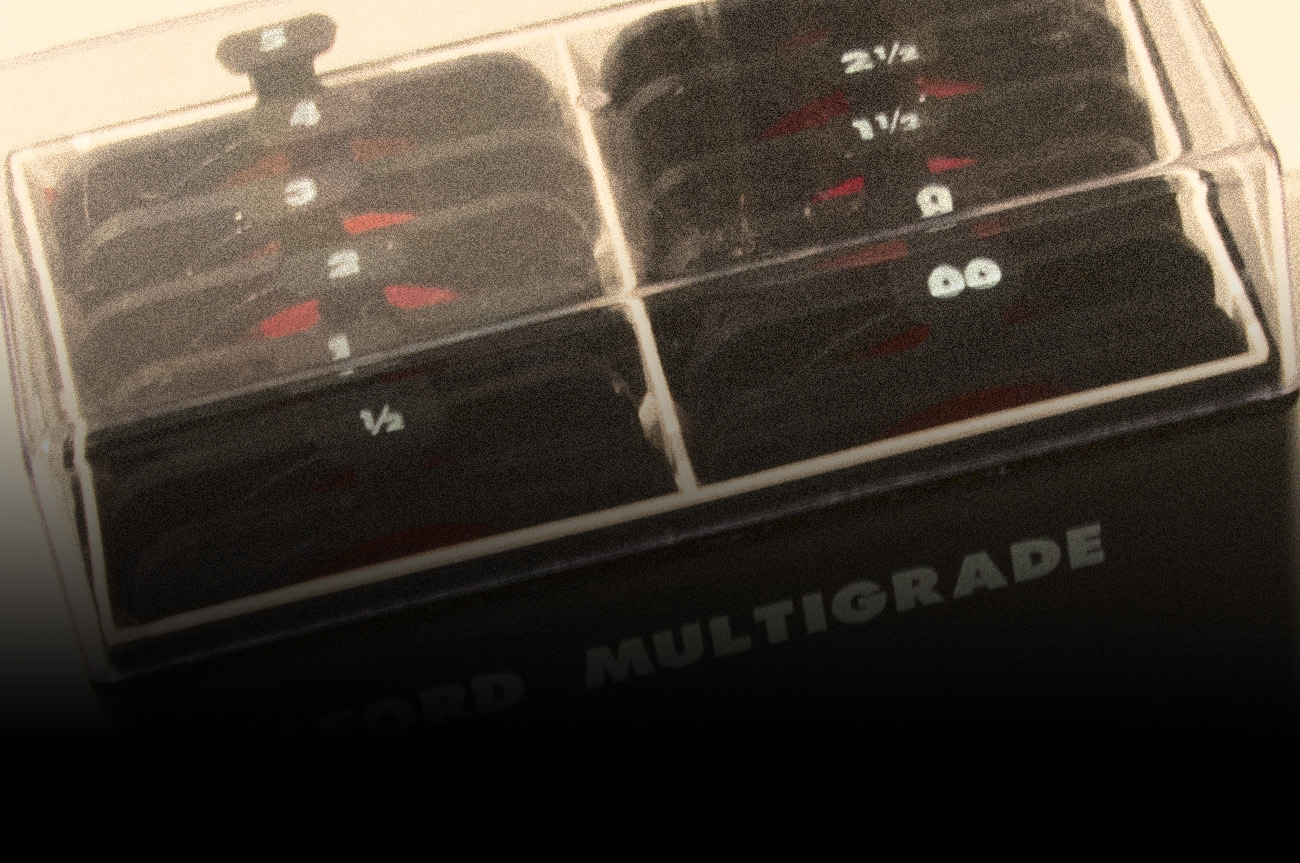
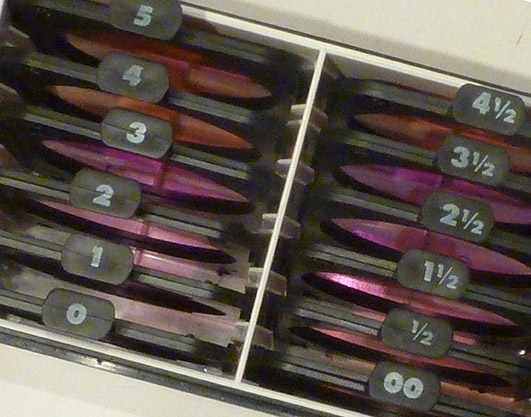
To change the contrast of the paper to match your negative and to give your prints the contrast that you want, you will need a set of filters. The easiest to use are Ilford Multigrade Filters. These are speed matched, and come in grades 00-5. For a colour enlarger buy the under-the-lens kit. For a condenser black and white enlarger with a filter drawer either buy the above-lens filters to go in the filter drawer or it’s easier to use the under-the-lens filters here too.
Processing Trays
You will need three trays for the processing chemistry, and a larger tray for washing prints. They are usually made of plastic and come in many different sizes. If you buy the size to match your paper dimensions you will use the smallest amount of chemicals. This will save you money!
Graduated Measuring Cylinders
I suggest you buy a one litre size rigid plastic graduated measuring cylinder for making up your print chemicals and a smaller (half litre) one for making up film chemicals. Other liquid measuring containers, such as jugs, can also be used but are not as accurate as a ‘cylinder’ style graduate, so if you do not use a graduated cylinder you will have to accept more variability in your film negative quality in particular.
Tongs
Tongs are a good idea to avoid putting your fingers in chemicals. For example, Developer is a skin irritant, Ilford stop bath is mainly citric acid (lemon juice!) and fixer is mostly acetic acid (vinegar!) both of which are weak acids and will dry out your hands and irritate your eyes if splashed there but should not cause acid burns or any serious injury when used in normal darkroom processes. Just wash off your hands with running water to remove any darkroom chemicals. You’ll need at least three tongs, one for each chemical step.
Clock or Process Timer
A clock, timer or stopwatch is used to achieve accurate timing for film processing. Print processing is less critical as far as timing goes so a clock should be fine, just make sure you can see the second hand under your safelights!
Thermometer
Mercury thermometers are the most accurate but are too hazardous if they break. I have used thermometers from hardware stores and garden centres as well as ones designed for use in darkrooms. Both types work fine. If you have more than one, note they are not interchangeable unless fully calibrated together.
Containers and Bottles
You will need some small containers for holding working strength film chemicals. I use small plastic buckets, labelled so that I don’t cross-contaminate my chemicals. Storage bottles are used for mixed stock solutions, such as stop-bath, which is reusable. Do not use old beverage/soda containers that could be mistaken for beverages!
Towels
Use an old washable small towel or paper towels, to keep your hands dry.
Anti-static Cloth/Compressed Air/Blower brush
A blower brush, canned compressed air or an anti-static cloth is used to gently wipe dry negatives to remove dust before printing. These are specialised cloths sold in camera stores and are NOT the “lint free’ cloths sold in big box stores.