I have been fortunate enough to have a few rides in aircraft other than big airliners. This gives some scope for taking photographs, which is difficult from big planes as the windows are several layers thick and distort the view.
If you haven’t seen much fine art aerial photography have a look at the work of the late Bradford Washburn on Google or in your local library/bookshop. He did some spectacular photography. Not just the usual aerial views but intricate pattern pictures, some quite abstract.
This blog post gives a few hints and tips based on my limited experiences.
When you’re high on a mountain it’s easy to imagine you’re in a plane and mimic aerial shots just by having a big drop in front of you and nothing close to the lens. So for me I was more interested in the patterns in the landscape than taking mountains from planes, although I did both as the viewpoints from planes are not accessible in any other way.
Helicopter Photography
I have been ski mountaineering quite a bit and ended trips 3 times with a day of heli-skiing. This has the advantage that you can spread the cost of the helicopter flight with several other people! The friends I shared with all appreciated that I needed to be in the best seat for photos, usually up front next to the pilot. Our mountain guide, always Jon de Montjoye, and the other 2 or 3 were in the back.
Unfortunately the windows have to stay shut in helicopters in the Alps, I think they’re afraid you’ll fall out through them! This means that you have to take your photographs through the helicopter clear plastic shell which is a bit like a large plastic bubble. The see-through floor is a little disconcerting at times!
The plastic adds distortions and reflections. You can use a polarising filter to try and remove some of the reflections if you have high ISO film/high ISO digital. The polariser will lose you 2 to 3 stops when giving the maximum effect, in fact it takes 1.5 stops as soon as you screw it onto the lens so don’t use it unless you need to.
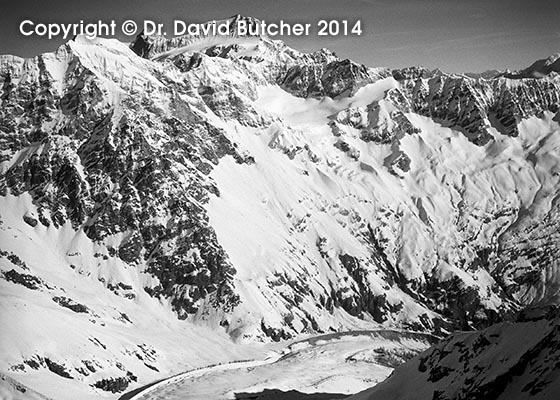
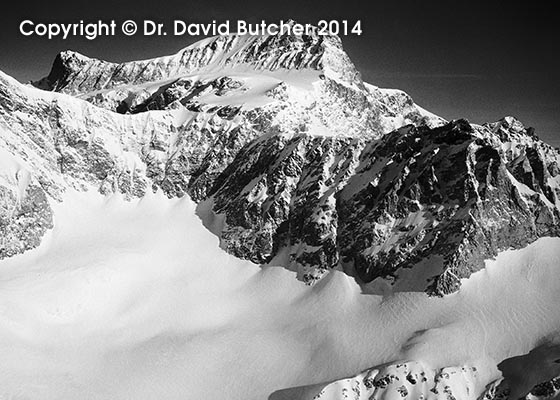
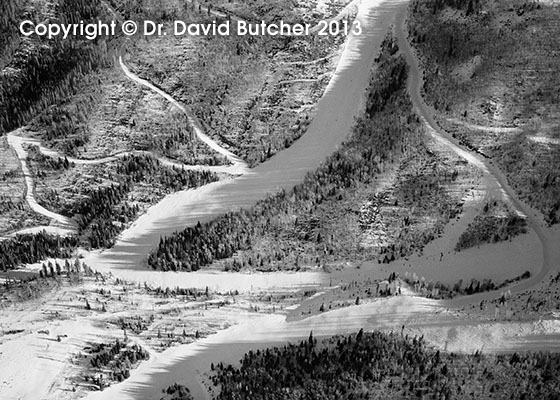
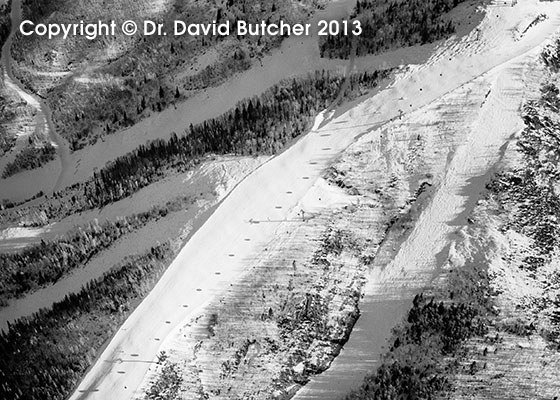
The Valgrisanche and Strahlhorn shots here have all had severe cropping to remove reflections on the negative. You can get away with some over the mountains but in a clear sky it’s too obvious and has to be cropped. The sharpness is always reduced when taking photos through windows/cockpit so some of these images were unusable at the time I took them as the reduced sharpness would be unacceptable on big darkroom prints. Now with film scanners and Photoshop sharpening tools that’s changed somewhat and previously unusable images can now be printed large.
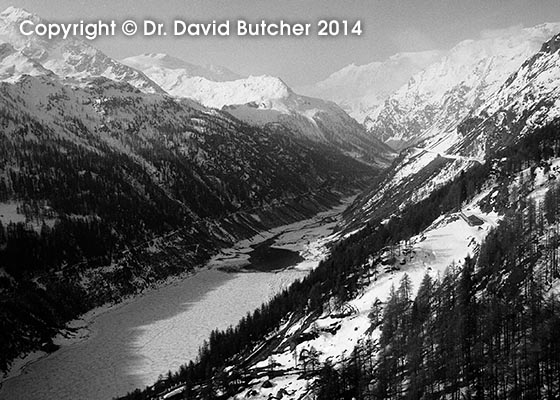
Valgrisanche from the Air
Strahlhorn and Macugnaga Valley from the Air – wide view
Strahlhorn from the Air – same lens as the previous one but taken from closer position
Light Aircraft Photography
I was fortunate to be offered a ride in a light aircraft by a very generous friend of a friend who lives in Steamboat Springs in Colorado and who had his own plane. I checked beforehand that I could take shots through an open window which was confirmed. This made a big difference to the picture quality but it was bloody cold!
I took 2 lenses but on checking while sitting in the aircraft before takeoff I could see that the normal 80mm lens on my Mamiya 7 would be best to avoid the aircraft structure in the photos. The 80mm lens is equivalent to a 50mm lens on a full frame digital camera.
I had a bit over an hour in the air and ran off 3 rolls of 10 shots on Ilford FP4 Plus 120. I fixed the shutter speed at 1/125 after stopping the lens down just 1 stop to f5.6 for best sharpness. The vibrations were very severe so the last film was shot at 1/250 wide open (f4) and these were in general sharper than the first 2 rolls. I used my usual Sekonic 508 spot meter to check the exposures every now and then as the scene changed.
If I had planned to do aerial photography I would have taken Ilford 400 Delta to give me a couple of extra stops of speed, 1/500 would have given sharp negatives despite the vibrations and bouncing up and down in the cockpit. Ilford 400 Delta is much finer grain than HP5, for example, but a bit more grainy than FP4.
A traditional aerial photograph of Mount Zirkel. The extra height above the mountain and the feel of the shot lets you know it was taken from a plane.
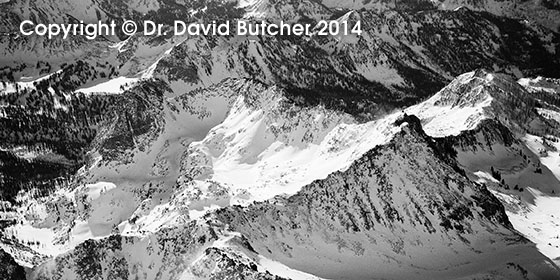
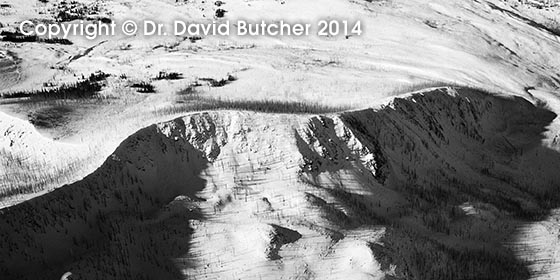
Another view of the Mount Zirkel area. This time we are seeing a bit more of a pattern emerging, not just the mountain range.
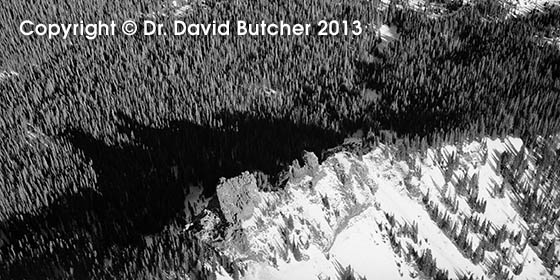
This is Rabbit Ears Pass from the air. The rock features called Rabbit Ears are better seen with their shadows on the trees. At ground level it’s the rocks themselves that make the picture.
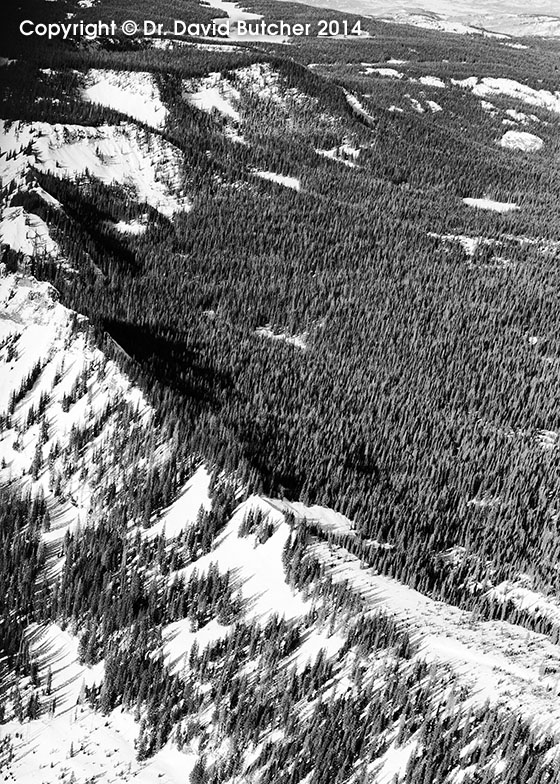
The Mount Zirkel ridge with thousands of trees. I put the ridge on the edge of the shot to highlight the trees and long shadows while eliminating the wing strut and undercarriage from the shot!
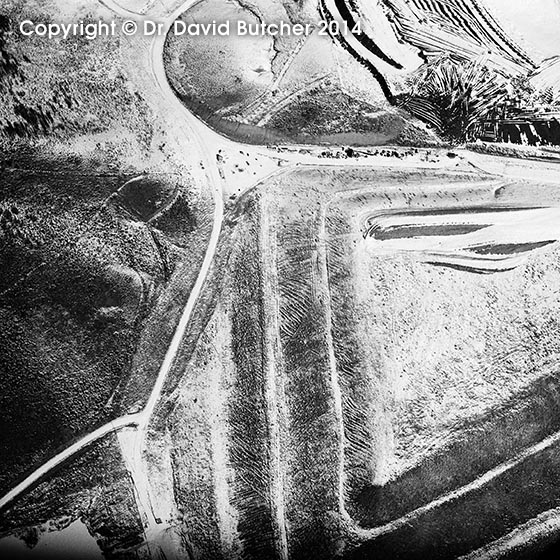
Here are a couple of land pattern photos of the Steamboat Springs ski area from above
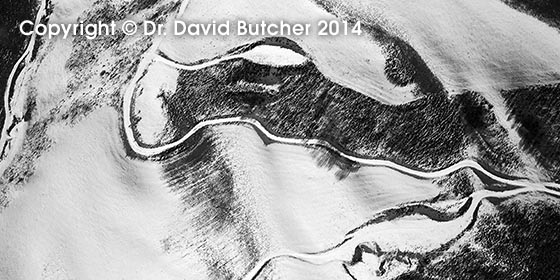
Now some more abstract land pattern photographs with snowy roads and land features
Hope that gives you some ideas. Now where can I scrounge another ride in someone’s plane from?